A new, original type harness is still available, but I spent some time reading about the Advanced Auto Wire (AAW) harness, originally designed by Dan Masters, and was convinced that it was the correct way for me to proceed.
Several 6-Packers have installed the AAW harness, so I have tried to learn from their experiences. My car should be easier, because it's a fresh rebuild with no interior "stuff" to get in the way!
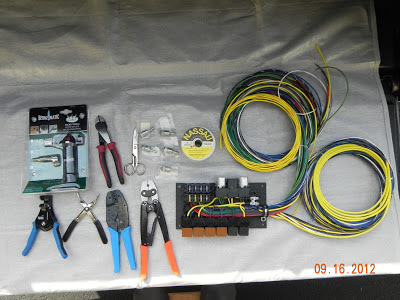
The "power block" on the right side of this photo is the heart of the AAW harness.This photo also shows the special tools recommended to help make for a first class installation.
The wiring diagram that comes with the harness takes a little time to understand unless you do this type of thing for a living, but taking small sections at a time seems to work best for me.
Of course, laying the wires out and doing a thorough inventory is a must ! You also need to look closely at the color of the wire and the color of the tracer...ie...green with a brown tracer looks very close to green with a red tracer.
Poor grounds are the cause of many electrical problems, so again, following the path of other 6-Packers, I decided to create several additional ground points. One of the cooler tools I bought for the grounding part of this project is the "bonding brush" used in the aircraft industry (Brown Aviation) to insure a good grounding surface.
This drill-mounted brush cuts through the paint / primer and creates a nice and neat round grounding point
The main ground cable attaches to the body and the engine.
One of two ground points added to the rear of the car.
Ground bar added to the front of the car
It's now time to start threading all those wires through the car...wish me luck !


