Trailing Arm Upgrade

I've mentioned before that I'm trying to include upgrades in this restoration, and the rear suspension was a bit of a weak sister as it came from the factory, so here is the first upgrade in this important area.


This is the problem area....5/16 steel studs screwed into aluminum, and torqued to only 16 lb ft max.  Rear wheels have been known to come off because of stripped threads....not good !


Bob Danielson (BobbyD) knew what was needed...steel Keenserts installed so the steel studs could get a real grip. This requires drilling out the old threads and using a tap to cut in new threads so the Keenserts can be installed.


The challenge was making a jig so the average guy could do this at home.  The six studs all have to be exactly perpendicular to the trailing arm, so the jig would need to be foolproof and precise. At this point Bob got Rick Patton involved. Rick is not only a TR6 guy, but he also runs a machine shop business, and he came up with a kit that allows even guys like me to perform this task !  Thanks Guys !!


A 1/2" thick piece of billet aluminum bolts to three existing studs...incredibly precise.


A drill alignment mandrel made out of hardened steel keeps the drill bit perpendicular...when I first put this together I thought of a fine Swiss watch, it's made to that degree of precision.


The drill bit is "X" size


A 7/16-14 bottoming tap


Here is what you need to get started.


Once the hole was drilled out, the tap work was easy..


Pull off the plate and screw in the Keenserts


A special tool comes with the Keenserts and is used to drive home the locking prongs.


Move the plate and repeat the process for the next three studs. Below, one side is done and ready for the new studs.


New studs with red loctite will ensure these bad boys will be good for the duration ! 


Here is the link to  Bobby D's site with more details....http://tr6.danielsonfamily.org/TAJig.htm


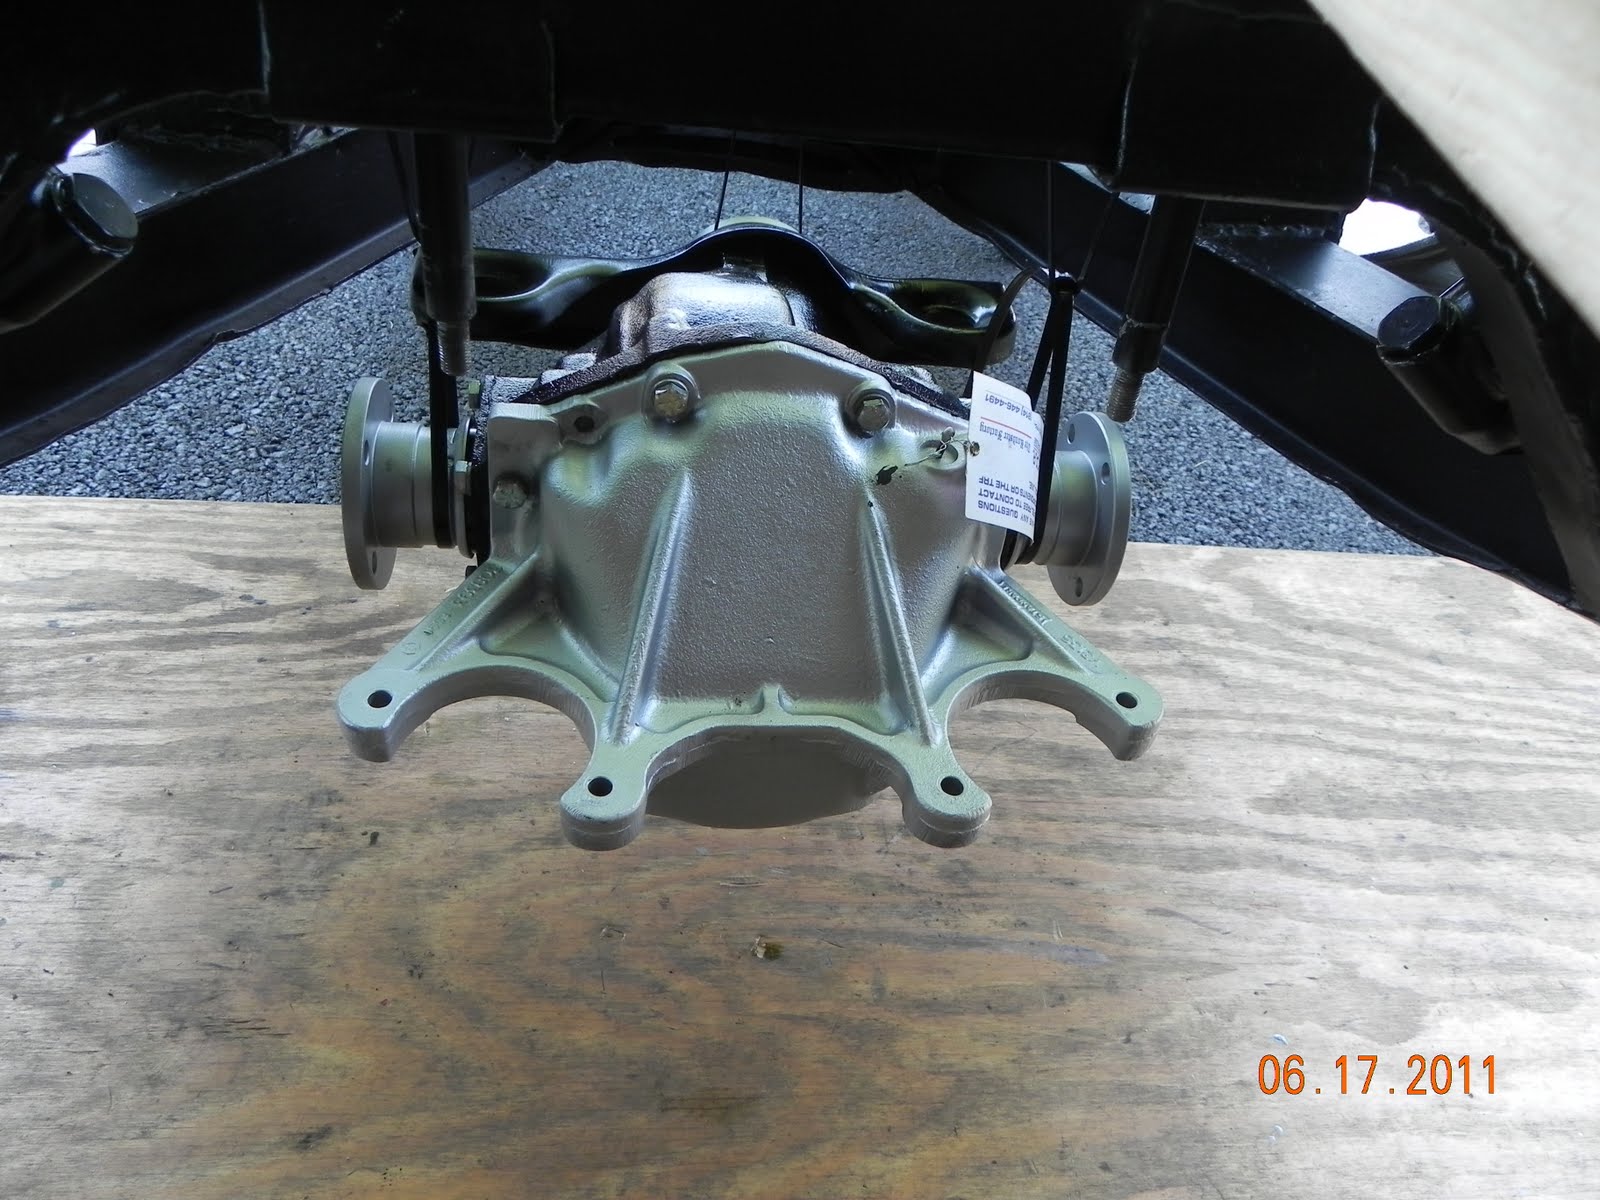
Time to put the "Pumpkin" back in place.

Those of you who have been following this blog may remember back to last November when Rhoda and I loaded up my differential, a.k.a the "pumpkin", and headed for TRF's C.A.R. shop in Armagh, PA., to drop it off for rebuilding. Tom Spadafora returned it a week later looking better than new !


Well, now it's time to put this bad boy back in the frame!  Now, I could have used my super strength to hold this 80 + lb chunk of  metal in place with one hand and install the nuts and washers with the other, but I promised the wife I wouldn't show off, so here is how it came together. :-)

I knew those extra heavy duty cable ties would come in handy some day...just keep inching the diff  into position. 
   Slow but sure.

A six- piece urethane mounting kit from TRF will help insure this process won't be repeated for a long time!


It does take a bit of fiddling / wiggling to get the mounts all in place so the nylock nuts can be installed


I couldn't resist adding a "before" pix of the differential and suspension !


Hey, it's time to quaff a root beer to toast getting a major piece of the drive train back in place !

More Rear Suspension Progress !

The trailing arm brackets are mounted to the frame, and the Nylatron bushings and sleeves are installed in the trailing arms, so let's bolt them up !  Wait a minute not so fast...first I need to measure and fit spacer / washers provided in the Good Parts rear bushing kit.
These special washers/spacers, sized from .010 to .080, are stamped "1" for the .010, "2" for the .020, etc., and go on each side of the sleeve/bushing assembly. They are designed to provide a clearance of  .002 to .012 between the spacer and the bushing...try different combinations until the spacing is correct.  Bobby D has an excellent explanation on his web site.   http://tr6.danielsonfamily.org/TrailingArmBushingInstall.htm


The sleeve fits against the inside of the spacer (on left), and the outside or "top" of the spacer (on right) will tighten against the bracket. (The sleeves slightly extend out beyond the bushings.)


 All buttoned up


I got to admit, getting both trailing arms back on the frame made me feel pretty good !


Well, now that the T/A's are in place, I can think about installing the rear shocks and springs.  Last winter I sent my lever shocks off to Peter Caldwell at World Wide Auto Parts for rebuilding. Peter got good reviews from the 6-Pack gang and rebuilds shocks for many British / European cars...old and new !


Just torque down two new stainless steel bolts on each shock and your done! Oh, from the lessons learned department, be extra careful about the threads on the frame when putting on the POR-15...you would be amazed how hard it is to get the bolts into those threads once the coating has set up !


 Ok, now comes the tough part...getting the new springs back in place.


 I ordered  new stock height springs, urethane packing for them, and two urethane rear link assemblies from TRF.  My spring compressor was again called on to compress the new springs once I had them in place with the new packing.  The rear link assembly is fastened to the shock first, then as the spring is compressed, the T/A comes up high enough for the lower bolt on the link to be fastened in place on the T/A.


Once the fasteners are torqued down, you're ready to move on !

Rear Suspension and a Cool Canopy

It's time to move on to the rear suspension, but first, wife Rhoda is concerned about me working in the afternoon sun.  The Man Cave entrance faces west, so by 4pm I'm getting the full sun effect, and even with a fan running it gets pretty hot. A trip to Lowe's provided the answer...a pop-up  8' X 10' canopy that was inexpensive, is easy to put up and take down, and takes a big  bite out of Mr. Sun's rays.


Once the heat issue was addressed, it was time to mount the new adjustable trailing arm brackets from Good Parts. These brackets control the rear camber and are a big improvment over the stock non-adjustable brackets.


I forgot to take pixs of just the brackets mounted to the frame, so we have to settle for photos that include the trailing arm!


The rear trailing arms were cleaned and painted last fall and have been waiting to be re-installed.  New rubber plugs from TRF were ordered to close up the casting holes, and new Nylatron bushings were ordered from Good Parts. Nylatron is self -lubricating, moly impregnated bushing  that doesn't compress under load like rubber or polyurethane, improving handling / steering response.  Some folks point out that a car equipped with Nylatron bushing rides harder because of this lack of compression...hey, this is a sports car, it's supposed to ride a little rough !   Below are two of the Nylatron bushings and the stainless steel sleeve provided in Richard's kit.

When Triumph was manufacturing these parts, it was far from a exact science, so the new bushings are made slightly oversized to accommodate the variances in trailing arms. It's up to the installer to hone the T/A mounting holes for the correct fit. 

Another complaint I heard about Nylatron bushings was that they would squeak. On one of the 6-Pack threads, a pre-lubricant made by Energy Suspensions was noted for it's ability to eliminate this problem. I had to order it from a local hot rod shop, and it's really sticky, but I'm hoping this will stop any unwanted noises. 


 Honing the mounting holes in the T/A for the bushing to fit is a very tedious process. You want the bushings to be a tight fit, but not so tight that the stainless steel sleeve can't be pushed in by hand. Well, I ended up with two of my bushings being too tight for the sleeve, and there isn't a way to remove the Nylatron bushings once both are installed without destroying them. Now what ?! 


It seems I'm not the only guy to have battled with the Nylatron bushings.  Bob M. (BM80), from the 6-Pack, also had problems, but he was smart enough to come up with a fix. Bob figured out that a 23/32 adjustable hand reamer from MSC Industrial Supply can be used to shave the inside of the Nylatron bushings enough to allow the correct fit for the .751 sized sleeve. Bob even checked with Richard Good to confirm this wouldn't be a problem. Thanks Bob !!

This is a hand reamer, but even so, be very careful how much material you take out.  I was amazed that the little bit I removed allowed my sleeves to fit perfectly.

With shipping and tax, the reamer ended up costing me $42.00, so if any of you 6-Pack folks find yourself  in need of one, send me a PM and I'll loan mine out, your only cost will be shipping it back to me.

Parts That Help You Stop and Turn !

There is nothing like spending a few hours at a British car show to inspire working on your own car !

I'm at the point where front brake calipers and the steering rack are ready to be installed.  Last winter I sent my front calipers and steering rack off to TRF's C.A.R. shop for rebuilding by Tom Spadafora.  Tom takes your original parts, completely disassembles, cleans, then  reconditions them into better than new with things like stainless steel pistons in the brake calipers. 


I elected to upgrade to the EBC "green stuff" brake pads.  Made with Kevlar, these pads provide 20% better braking (claimed) and users report better initial bite when braking, plus less brake dust.


Hey, this is starting to resemble something automotive !


My rebuilt steering rack from TRF and Richard Good's solid machined aluminum steering rack mounts. I don't have a pix of the rack before, but it wasn't pretty !

The rack in place ready to be fastened tight.


When I first started reading the 6-Pack threads, I came across a post that was talking about the steering rack "button" and how you mustn't loose it.  I never did find the original one on my car, so I was glad to see my rebuild included the white button that controls the feel /tightness of the rack.


All done except for inserting the tie rod ends into the steering arms.

British Car Show Time !

 June is prime time for classic car shows, and sports car folks can enjoy a very nice show put on by the Lake Erie British Car Club called "The British Return to Fort Meigs".  For those of you not familiar with Northwest Ohio history, Fort Meigs is on the Maumee River in Perrysburg, Ohio, and was the site of a very decisive battle during the War of 1812.  American General Anthony Wayne convinced the Brits they really didn't want to stay in Ohio after all !  Today, Fort Meigs is a historical site complete with a  re-created fort and lots of grass fields to park British sports cars, motorcycles, etc.  Here are a few pics of some of this year's cars.

Below, a really nice '68 TR250 !


For you non-Triumph folks, the TR250 was a one- year only car that had the body from the older TR4A mated to the new six cylinder engine destined for the TR6.


What says British sports car better than wire wheels !


One of several beautiful Jaguars


I don't think I'll get too much argument by saying the MG TC/TD cars of the late '40's are really responsible for the sport car fever that swept the US for the next 30 years.

Here is a wonderful example.. a 1949 MG TC.


What's a British car show without a Rolls Royce ?

Complete with dining fine china and silver !


I'll finish up with a very nice TR6 in British racing green.