I spent quite a bit of time "fiddling" with the last foot of wiring at the dash- trying to make it as neat as possible by bundling all the wires going in the same direction and then cable tying the bundles and labeling the various wires.
I know this doesn't look nice and neat ,so let's call it organized confusion!
No matter how you bundle the wires, there has to be enough slack to reach to the various gauges.
The end result is wiring that doesn't jump out at you when the dash is pulled open.
Ok, see these little guys(below)...they clamp the Speedometer and Tachometer to the wood dash (two for each gauge). Well ,guess what, I could find just two in my dash parts bag, not the four I needed. Since this is not something you will find at your local hardware, a call to Scott at Team Triumph produced the needed parts. What a great resource for obscure parts!
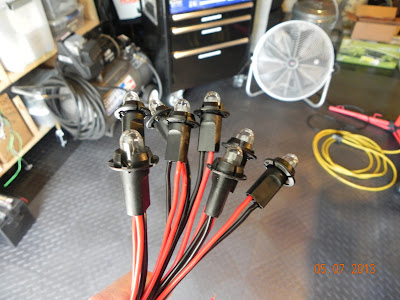
One of the things that slowed down this project was the lamps for the various gauges. I didn't want to re-use the old sockets, so I called Josh at British Wiring ,and he advised that the only replacements available were plastic two-wire sockets. I ordered enough for all the dash lamps.
My rusty soldering skills got a refresher course!
One down 15 more to go !
Hey ,that wasn't so bad!
The next issue was... how do I deal with all those red/black wires? Another look at the British Wiring web site revealed various sizes of multi- connector blocks.
By looping the pins together, I had one point for power/ground.
During the middle of this process, a thread on the 6-Pack web site was posted concerning dash board wiring, and "Waytekwire" was mentioned as a vendor with a more streamlined connector.
Ok, I've got to add this caveat. The original "one wire" sockets (they get the ground through the metal teeth) are probably a better solution for the tach and speedo gauges (8 lamps). The plastic lamp sockets don't fit tight enough and tend to pop out while you're "fiddling" under the dash. I spoke with Josh at British Wiring, and he hopes to get the older style in the future.
I also did some "custom" work on the dash, like moving the key back to the center console, adding a "push button" starter, and replacing the rheostat with a power outlet.

The aluminum plate with the toggle switches will eventually go where the radio would have normally been. It contains things like my hazzard switch/indicator, electric fan switch/indicator, and the overdrive controller indicator . (007 approved) :-)
Well, now that the wire harness is in place, it's time to start the engine!
Stay tuned!!


